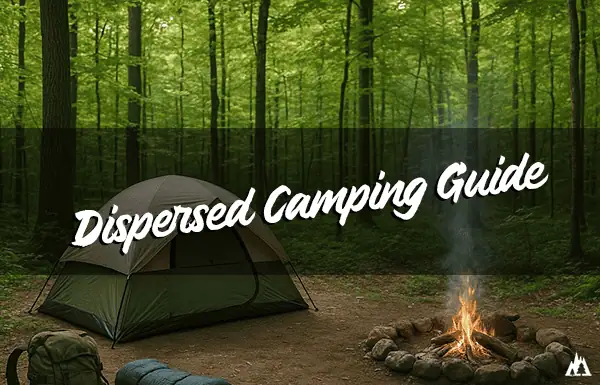
How to Locate Dispersed Camping Sites on Public Land: Complete Guide
If you’ve been camping for as long as we have been here at RTW, you probably have experienced the pain of reserving a popular campsite.
It’s really a pain, where you’ll have to wait for the window to open for reservations 6 months in advance in hopes of grabbing a campsite against hundreds of other folks.
Not all campgrounds are like this, but the really nice ones are ALWAYS a challenge.
What if I told you that you can find a great campsite, that isn’t crowded, and free?
That’s where dispersed camping on BLM comes into the chat.
And while there are pros and cons to dispersed camping, its definitely worth a try if you’ve never tried it before.
Finding free camping spots away from the crowds is actually easier than most folks expect. You can locate dispersed camping sites on public land by using digital tools like onX Offroad and CalTopo to identify National Forest and BLM areas, then checking local regulations before picking your campsite.
Dispersed camping on public lands opens up over 440 million acres of free camping opportunities across the United States. That’s a lot of room to roam.

Most campers don’t realize that camping is available for free outside of designated campgrounds on most public land. You can camp in National Forests, Bureau of Land Management areas, and other public lands as long as you follow basic guidelines and avoid posted restrictions.
This type of camping offers peace and solitude—no reservation fees, no packed bathrooms, just you and the wild. The key to successful dispersed camping is knowing which lands allow it, how to check regulations, and what tools to use to find legal spots.
You’ll need to identify public land boundaries, navigate local rules, and practice responsible camping to keep these places open for everyone.
Key Takeaways
- Use digital mapping tools and apps to spot legal dispersed camping areas on National Forest and BLM lands.
- Always check local regulations and restrictions before camping to avoid issues.
- Practice Leave No Trace principles and responsible camping to help preserve public lands.
Understanding Dispersed Camping

Dispersed camping is camping on public land outside of established campgrounds. It’s free, usually has zero amenities, and demands a bit of self-sufficiency, but you get freedom and save money.
What Dispersed Camping Means
Dispersed camping means setting up camp outside of established campgrounds, usually on public lands like National Forests or BLM areas. You pick your own spot—no developed pads, no picnic tables, just open land.
Common Names for Dispersed Camping:
- Boondocking – camping without hookups
- Primitive camping – camping with little or no facilities
- Wild camping – camping in natural settings
- Free camping – camping without fees
You can camp for free without reservations or fees on most public lands. The usual stay limit is 14 days in one spot.
National Forest Service and BLM lands offer the most options by far. State parks and private lands, though, usually don’t allow this style of camping.
Key Differences from Developed Campgrounds
Traditional campgrounds have restrooms, water, and trash bins. Dispersed sites? You’re on your own.
Campground vs. Dispersed Camping:
| Feature | Developed Campground | Dispersed Camping |
|---|---|---|
| Cost | $15-50+ per night | Free |
| Reservations | Usually required | Not needed |
| Facilities | Restrooms, water, trash | None |
| Privacy | Limited | High |
| Crowds | Often busy | Typically isolated |
You’ll need to bring your own water and pack out all your trash. Don’t expect fire rings or picnic tables at most sites.
Dispersed camping lets you skip the crowds and costs of traditional campgrounds. You get to pick your own spot within areas where it’s allowed.
Benefits and Drawbacks of Free Camping
Benefits:
- No camping fees – great for longer trips
- Complete privacy – no neighbors unless you want them
- Flexible schedule – come and go as you please
- Natural experience – you’re really out there
Drawbacks:
- No facilities – bring your own water and pack out waste
- Limited accessibility – some spots need 4WD or high clearance
- Weather exposure – no shelters if it storms
- Safety concerns – remote locations, sometimes no cell service
You’ve got to be self-sufficient—water, food, waste, the whole deal. If something goes wrong, help may be hours away.
Dispersed camping is a way to connect with nature on public lands, away from designated campgrounds. It’s best for campers who feel comfortable handling the basics on their own.
Types of Public Lands for Dispersed Camping

The U.S. has 440 million acres of public land managed by different agencies, each with its own rules for dispersed camping. Most of the action happens on National Forest Service land and BLM-managed areas, but state forests and a few private lands offer options too.
National Forests and U.S. Forest Service Land
The U.S. Forest Service manages 193 million acres of public land across 154 national forests. These are your best bet for finding dispersed camping in most regions.
You can camp pretty much anywhere in national forests unless there’s a sign saying otherwise. Forest Service roads marked “NF-##” on maps often take you to good dispersed camping areas.
Key features of Forest Service lands:
- Free camping, no reservations
- 16-day maximum stay limit
- Move at least 5 miles after 16 days
- Usually open all year
National forests often surround national parks, making them perfect for budget-friendly base camps. You’ll find most dispersed sites along forest service roads that branch off highways.
BLM Land and the Bureau of Land Management
The Bureau of Land Management oversees 247 million acres of public land—the most of any agency. BLM lands are famous for dispersed camping.
BLM land offers free dispersed camping in some of the country’s wildest places. You’ll mostly find these in western states like Nevada, Utah, Arizona, and California.
BLM camping rules:
- 14-day maximum stay in most places
- Move 25 miles after 14 days
- Camp within 150 feet of roads
- Stay 100 feet from water
BLM areas tend to be more open—think desert, sagebrush, big skies. Great for stargazing, though you might miss the shade.
Local BLM offices often have maps showing popular dispersed camping zones. It’s worth stopping in for up-to-date info.
State Forests and Wildlife Management Areas
State forests and wildlife management areas sometimes offer dispersed camping too. Each state sets its own rules, so don’t assume anything—check first.
State forests usually allow dispersed camping with rules similar to federal lands, but some require permits or small fees. Wildlife management areas might have restrictions during hunting seasons or animal breeding times.
State lands are often closer to cities, making them handy for quick getaways. For the details, contact your state’s forestry or wildlife office—some even have online maps.
Additional Public and Private Lands
Some private lands let you camp through programs like Harvest Hosts or Hipcamp. You’ll pay a fee, but you might end up at a vineyard or a farm—can’t complain about that.
National grasslands (managed by the Forest Service) allow dispersed camping too, especially in the Great Plains. Army Corps of Engineers lands around lakes and rivers sometimes allow it as well, but you’ll need to check with local offices.
Some Native American tribal lands offer camping, but you’ll need a permit. Always contact the tribal office directly for info.
Research tools for finding additional lands:
- Campendium app for user-generated campsite info
- iOverlander app for remote spots
- Local ranger stations for current conditions
Essential Tools and Apps for Finding Campsites
Technology has made finding dispersed camping spots way easier than just asking around. Digital maps, camping apps, and official resources can help you find legal spots and get there safely.
Using Google Maps for Planning
Google Maps is a solid place to start your dispersed camping search. You can spot national forests, BLM zones, and get a feel for the terrain before diving into more specialized tools.
Search for national forests or BLM lands near where you want to go. Satellite view helps you find clearings and roads that might lead to good campsites.
Google Maps is also handy for planning your route and figuring out where to grab last-minute supplies. The terrain view will show hills and valleys that could affect your trip.
But—Google Maps doesn’t show current road conditions, seasonal closures, or specific camping rules. It’s best for scouting, but always double-check details with other resources.
Resources Like The Dyrt and FreeCampsites.net
The Dyrt provides the most comprehensive campsite reviews from actual users. The app includes a dispersed camping filter, so you can quickly spot free camping areas with detailed feedback from folks who’ve actually been there.
User reviews on The Dyrt are surprisingly helpful. They’ll mention things like seasonal closures, water access, or if a spot’s just way too crowded for comfort.
The Pro version is $35.99 a year. You get offline maps and extra map layers, which honestly feels worth it if you’re out of cell range a lot.
FreeCampsites.net offers the largest database of free camping locations across the United States. The site is totally free and built on crowd-sourced info.
You’ll find everything from wilderness dispersed sites to quirky alternatives like Walmart parking lots. Just filter your results to focus on true dispersed camping on public lands.
FreeCampsites.net is best for scoping out options before you dive deeper with other resources. It’s easy to miss some gems if you don’t cross-check a few sites.
Motor Vehicle Use Maps (MVUM)
Motor Vehicle Use Maps show all legal roads and camping areas in national forests. The Forest Service publishes these maps for every ranger district, which is pretty handy.
Avenza Maps provides free access to downloadable MVUMs for your phone. Just search for your national forest and grab the right map for your area.
On these maps, look for two dots on both sides of forest service roads—that’s where you can legally camp within 150 feet of the road. It’s a weirdly specific symbol, but once you spot it, you’ll know.
The maps also highlight seasonal closures, vehicle rules, and places where camping’s off-limits. Always double-check the latest MVUM because rules can change faster than you’d expect.
Offline Maps and Navigation Tools
Gaia GPS offers the most robust offline mapping system for dispersed camping. It combines topo maps, public land boundaries, and forest service roads in one place.
The public land layer is great—it instantly shows which areas allow free camping. Pair that with the USFS road layer, and you can find legal spots even if you’re totally off the grid.
Download your maps before you leave home. Dispersed sites almost never have cell service, and Gaia’s premium plan ($39.99 a year) lets you download as many as you want.
The app can help you locate water sources, hiking trails, and other activities near your camp. That’s a nice bonus if you’re planning to stay a while.
Other offline options like onX Offroad and CalTopo are worth a look if you need more specialized navigation or want to check land ownership boundaries. Sometimes it’s nice to have a backup.
Step-by-Step Process to Locate Dispersed Campsites
Finding a good dispersed campsite takes a bit of a process. You’ll want to map public land boundaries, check road access, spot existing campsites, and keep track of your favorites.
Identifying Public Land Boundaries
Start by using onX Offroad or similar mapping apps to see who owns what. These overlays make it clear where public land ends and private property begins.
Keep an eye out for these on your map:
- Bureau of Land Management (BLM) – usually in yellow or orange
- National Forest Service (USFS) – typically green
- State forests – colors vary by state
- Wildlife Management Areas – often purple or blue
Always download your maps before heading out. Cell service is spotty at best in the places you’ll actually want to camp.
Watch out for camping restrictions. Some public lands have rules about distance from water or close for part of the year.
Zoom in on those boundaries. It’s shockingly easy to end up on private land by accident, and nobody wants that hassle.
Evaluating Accessibility and Terrain
Use Google Maps satellite view to check road conditions and terrain before you drive in. Look for actual dirt roads, not just faint lines or overgrown tracks.
Road difficulty indicators:
- 2WD accessible – wide, decent dirt roads
- 4WD recommended – narrower, maybe rocky or steep
- High clearance required – deep ruts and big rocks
Don’t forget to check elevation and the weather. A mountain site could still have snow even if it’s hot in the valley.
Look for flat, open areas at least 200 feet from water. Avoid washes or low spots that might flood if there’s a storm.
Be honest about your vehicle. Getting stuck out there is a headache—and it’s not great for the land, either.
Spotting Established Dispersed Campsites
Search for existing campsites using iOverlander to get started. Reviews sometimes mention nearby sites that aren’t even listed.
Here’s what to look for:
- Fire rings – rocks or metal
- Cleared flat areas – enough space for your rig
- Access spurs – little roads off the main drag
- Trash deposits – unfortunately, these show a site’s been used a lot
Drive slow and scan for pullouts. Some of the best spots are tucked just out of sight.
Check FreeCampsites.net for GPS coordinates and photos. User-submitted pics can save you a wasted drive.
If a site looks trashed or overcrowded, keep moving. The most popular ones often show the most wear and tear.
Saving and Sharing Locations
When you find a winner, drop a GPS pin in your app. Add notes about road conditions, cell service, or what makes the site special.
Snap a few photos of the access roads or landmarks. It’s easy to forget the details, and it’ll help others too.
Stuff worth recording:
- GPS coordinates
- Road difficulty
- How many vehicles fit
- Nearby water or firewood
- Cell service (if any)
Share your finds on camping apps, but maybe skip posting pristine spots all over social media. Some places are better kept a little secret.
Create offline waypoints for your next trip. Downloaded maps with saved sites work even if you lose service.
Rate sites honestly in iOverlander or similar apps. If a road’s washed out or a site’s trashed, let people know.
Researching Local Regulations and Restrictions
Every public land area has its own set of rules for camping. Knowing about permits, stay limits, and any restrictions can save you a lot of trouble—and fines. It’s worth a quick check to make sure your camping experience is legit.
Understanding Area-Specific Camping Guidelines
Dispersed camping regulations vary wildly depending on the agency, location, or even the time of year. National Forests usually want you at least 200 feet from water and trails. BLM land tends to be a bit more relaxed.
Some spots only let you camp in existing clearings. Others let you make your own site if you stick to Leave No Trace basics. You might also run into rules about how close you can be to roads or facilities.
Vehicle rules change too. Some places are fine for RVs, others only for high-clearance vehicles. Watch out for weight or length limits on certain forest roads.
Fire regulations can change with the weather. Some areas have fire rings; others want you to use a portable fire pan, or ban ground fires completely during dry spells.
Permit and Stay Limitations
Most dispersed camping is free and doesn’t require a permit. That said, some busy spots now need reservations or daily permits to keep crowds down and protect the environment.
The common stay limit is 14 days in one spot. After that, you’ll have to move at least 25 miles away. In peak season, some places drop this to 7 or 10 days.
Group size is usually capped between 8 and 16 people. Larger groups might need a special permit and could have extra restrictions on where you can camp.
Seasonal closures hit a lot of high-elevation sites. Reasons range from snow and wildlife to fire danger. Some places even close for hunting or breeding seasons.
Contacting Ranger Stations
Ranger stations are your best bet for up-to-date info. Give them a call to check on road conditions, fire bans, or temporary closures before you head out.
Ranger districts can have different rules even within the same national forest. The closest station to your destination will have the most accurate details.
Many stations hand out free maps showing legal camping areas and places to avoid. These usually include water sources, road info, and any seasonal closures.
Staff can suggest sites based on your vehicle or group size. They’ll also share weather and safety tips for remote spots—worth asking!
Checking for Area Closures and Fire Bans
Fire bans and closures can change overnight. Always check official agency websites within a day of your trip for the latest updates.
InciWeb is the go-to for wildfire info and evacuation zones. Fires can close campsites with almost no warning, especially in dry months.
Weather can shut down high-elevation areas in winter, and spring floods can make roads impassable even if the area’s technically open.
Emergency closures pop up for all sorts of reasons—search and rescue, hazardous conditions, or wildlife. These usually happen fast and can last days or weeks.
Best Practices for Responsible Dispersed Camping
Dispersed camping only works if everyone follows Leave No Trace principles. Wildlife safety and packing out your trash matter, especially when you’re miles from anywhere.
Leave No Trace Principles
Leave No Trace is the backbone of good camping. Always set up at least 200 feet from water sources to keep them clean and protect the habitat.
Stick to sites that have already been used. Don’t start a new one unless you absolutely have to, and pick durable ground like rock or gravel—not soft plants.
Fire Safety Rules:
- Use existing fire rings if you find one
- Only build a fire if it’s allowed
- Keep it small—no bonfires
- Never leave a fire burning unattended
- Put it out completely before you go
For human waste, dig a cathole 6-8 inches deep and 200 feet from water, trails, and camp. Pack out all toilet paper and hygiene items—seriously, don’t leave them behind.
Wildlife Safety and Stewardship
Wildlife management areas need extra care. Store food, toiletries, and anything smelly in bear-proof containers or hang them at least 12 feet up and 4 feet out from a tree trunk.
Don’t feed wildlife or leave scraps. Animals that get used to human food can become aggressive and may have to be relocated—or worse.
Wildlife Encounter Guidelines:
- Make noise while hiking so you don’t surprise animals
- Keep your cooking area clean and free of smells
- Seal up your garbage
- Give wildlife plenty of space—no selfies with bears, please
Watch animals from a distance. Binoculars or a zoom lens are your friends. If you see aggressive wildlife, let the rangers know right away.
Pack In–Pack Out Methods
Pack everything you bring into dispersed camping areas back out with you. That means all trash, food waste, and personal stuff. Just bring extra garbage bags—you’ll probably need them.
Even organic waste like fruit peels, eggshells, and coffee grounds has to go. They don’t break down fast and can draw in critters you’d rather avoid.
Essential Packing Tips:
- Bring reusable containers to cut down on trash
- Pack biodegradable soap for washing up
- Carry a portable camp toilet if you’ll be out for a while
- Use a mesh bag to scoop up micro-trash
Before you leave, give your campsite a good scan. Look for bottle caps, food wrappers, or anything else that might’ve slipped through the cracks or blown off in the wind.
Tips for a Successful Dispersed Camping Trip
Dispersed camping isn’t just tossing a tent in the woods. It takes planning, the right gear, and a good dose of self-reliance. Out there, help might be hours away—so you’ve got to be ready.
Trip Planning and Essential Gear
Do your homework on where you’re headed. Check with local ranger stations for up-to-date rules, fire bans, or sketchy roads. Download offline maps, because cell service is often nonexistent.
Essential Water and Food Supplies:
- Pack at least 1 gallon of water per person per day
- Bring 2-3 days’ worth of extra food—just in case
- Don’t forget water purification tablets or a solid filter
- Use bear-proof containers if you’re in bear country
Navigation and Communication:
- Download topographic maps to your GPS device
- Bring a compass and paper maps for backup
- Pack an emergency whistle
- Two-way radios can be a lifesaver for group chats
Weather Protection:
- Four-season tent if the weather might get rough
- Extra tarps for ground cover or quick shelter
- Weather radio for updates
- Some cold-weather gear, even if it’s summer—you never know
Staying Safe in Remote Locations
Always let someone know where you’ll be and when you plan to come back. Share your GPS coordinates and route with a trusted friend or family member. If you’re camping on public land in the middle of nowhere, this is extra important.
Wildlife Safety Measures:
- Store all food, toiletries, and anything smelly in bear canisters
- Keep your campsite tidy—no food scraps lying around
- Make some noise on the trail so you don’t startle wildlife
- Don’t approach or feed wild animals. Seriously, just don’t.
Fire Safety:
- Check for fire restrictions before lighting up
- Use fire rings if you find them
- Keep your fire small and easy to control
- Have water and dirt ready to douse the flames fast
- Never leave your fire alone, not even for a minute
Camp at least 200 feet from water to help protect wildlife. Try to find flat ground, and steer clear of dead trees or loose rocks overhead—nobody wants surprises in the night.
Self-Sufficiency and Emergency Preparedness
When it comes to free camping, you really do have to be self-sufficient. That means packing all your own gear and being ready for emergencies, no matter what.
Medical Emergency Kit:
- First aid supplies for cuts, burns, and sprains
- Personal medications (bring extras just in case)
- Emergency pain relievers
- Thermometer and antiseptic wipes
- Emergency blanket
Vehicle Preparedness:
- Spare tire, jack, and lug wrench
- Jumper cables or a portable battery pack
- Basic tools for quick repairs
- Extra motor oil and coolant
- Tow straps and recovery gear
Waste Management:
- Pack out all trash, even food scraps
- Portable toilet or camp shovel for human waste
- Biodegradable soap for washing up
- Gray water disposal system
Emergency Signaling:
- Bright-colored clothing or fabric—something that stands out
- Signal mirror
- Emergency beacon or satellite communicator
- Extra batteries for every device
Always keep your vehicle fueled up and ready to go. Try to stash your emergency supplies somewhere you can grab them fast—just in case.